Knit Mania Continues (Jennifer Lauren Handmade-Gable Dress)

Knit Mania Continues (Jennifer Lauren Handmade-Gable Dress)

My new favorite thing is looking to the side for no reason

Do you remember a few years back, when Girl Charlee had a huge Black Friday sale? Well, I bought a ton of shit. Most of which I still have, because I don’t typically sew knits. Why I bought so many, I’ll never be able to rationalize. ANYWAY. One of those fabrics was this Red Glasgow print that you see above.

Many furry photobombs are included in this post.

More recently, the lovely Jen of Jennifer Lauren Handmade sent me the Gable Dress expansion pack. If this sounds familiar to you, it’s because I’ve made the Gable Top before, which you can see here and here. I must admit I was pretty stoked about it, I loved making the top and it is SO fast.

No face for you.

The Gable Dress sews up just as quickly. It does feature an edited bodice, so you will want to buy the expansion pack, and not just add a skirt. It’s only $3.50, honestly it’s worth it. As per the usual, I kind of disregarded the instructions again. Having sewn the top before, and fresh of my first clear elastic gathering on the Moneta, I wasn’t too worried.

I HATE THIS VIEW SO MUCH

Despite the pattern being super easy, I really put this one off. That’s partly because life is hectic, but mostly because of this fabric. I was nervous about a plaid for something with a gathered skirt, knowing it wouldn’t line up. Such a bummer! Also my machine just really hated this fabric. No amount of fiddling with the stitches fixed that. Eventually, I just gave up and accepted it for what it was.

See the wavy, wonky stitching?

I must confess, I wish the bodice and sleeves were a bit more snug. I’m not saying that’s a fault with the pattern, just that I like tight fitting clothing. Other than that, I really don’t have any complaints. It’s a great, simple dress that is just perfect for work. Going completely against everything I am, I like the high neckline. Eventually, I will get my chest done and have to cover that up during the day. Between this and the Moneta, my work wardrobe is becoming more knit dress than pencil skirts. Photo dump below, happy sewing 🙂

Flannel #2 (Sewaholic Granville/Sewaholic 1501)

Flannel #2 (Sewaholic Granville/Sewaholic 1501)

When you have dogs, your yard is just mud. Sorry.

This is my second go at the Sewaholic Granville, with more stash fabric. Again from Joann’s, again teal. What can I say, it was a phase. Though I think I recall these being from the same collection, this fabric is definitely a lighter weight, and therefore hangs differently. Blargh.

I don't know why my pictures are so grainy lately.
I don’t know why my pictures are so grainy lately.

The sewing is basically the same as my last Granville, with a few exceptions. Namely, I sewed the side seams at the recommended 5/8″, instead of the 1″ I’d done before. I thought maybe that would help with the gapping at the bust, but alas, it did not. I think that’s just bad snap placement. Or perhaps I should grade out there?  Either way, I really don’t like the shape this creates.  I think the combo of the fabric change and seam change made for a less flattering top.  Fuck it.

The back view is always just me standing weird.

This version was also a good bit rushed, as I wanted to wear it to a concert. That didn’t happen. However, the rushing definitely shows in the finished product. The stitching is a bit wonky, and the collar hasn’t help up to washing. Don’t rush your sewing folks! Does anyone else have a tendency to set arbitrary deadlines and then proceed to stress out about it? It’s so silly!!

Pictured: wonky stitching.

I can say, cutting was not nearly as bad this time. I don’t know if that’s a credit to simpler plaid, having just done this, or both (probably both), but it was a much speedier process. I’m considering doing my next Granville in a knit, so that cutting process should be interesting. Any suggestions??

070
Does anyone else get bored taking pictures of themselves?

I really can’t think of anything else to add, I think I said it all last time!! I still love this pattern, and will make it again. Happy sewing 🙂

Flannel Shirt Attempt #1 (Sewaholic Granville/Sewaholic 1501)

Flannel Shirt Attempt #1 (Sewaholic Granville/Sewaholic 1501)

How many excuses are you guys willing to accept for poor photography?

I’ve always had a deep love of flannel shirts. Unfortunately, I’ve also always had crazy long Stretch Armstrong arms, and those two things just don’t go together. For some time now, though, I’ve been wanting to make one but have also been super intimidated by it. The plaid matching! The sleeve plackets! The collar! THE FEAR

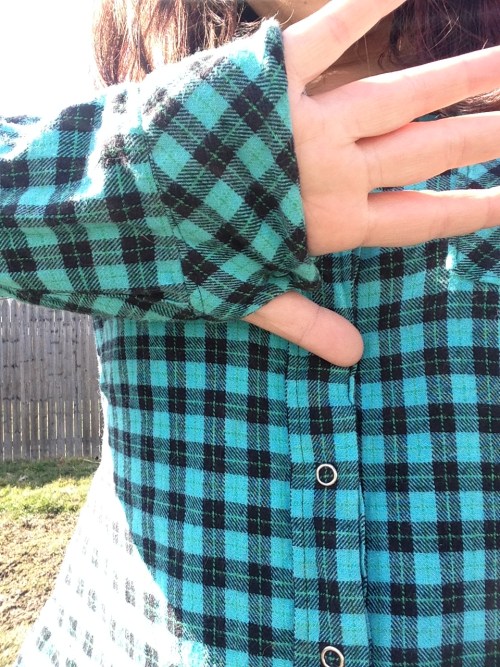
I also like to put my hands in my sleeves always.

I’ve had a few bits of flannel laying around for awhile, bought for a steal at Joann’s, so long ago that the fabric no longer appears to be available. I think it probably cost me about $3 a yard, so it seemed perfect for a wearable muslin. To do the plaid matching, I cut all my fabric on a single layer. I also cut one piece at a time, going around the body, using the piece I’d just cut to match the other, if that makes sense? Probably not the most efficient way to do things, but it was my plaid virginity and I wanted it to be good, dammit. That said, I did cut the pockets and yoke on a bias. With the seaming on the back, there was no chance of matching, and I just like bias pockets.

Not bad, for my first try at matching.

The pattern is the Sewaholic Granville, and it’s absolutely lovely. Tasia also has a super helpful sewalong on her blog, highly recommend. I cut a 10, which was actually a size down, but I wanted my flannel a little tight. I added two inches to the arms, and none to the body. Fun trick: I didn’t cut one front piece smaller or add a button placket. Instead, I cut both the same size, then pressed and folded the excess over (on the front) to create a placket look. I got the idea from Tasia, mine is a teensy bit different, but the same premise. I promise, it sounds a lot clumsier than it actually is. I omitted interfacing there, as I was using pearl snaps and didn’t think it was necessary. This was also my first try at flat felled seams, I think I’m in love. So clean looking!

Not the best photo, but check out those seams!

Speaking of snaps, I kind of disregarded the pattern instructions from button placement and just used my plaid as a guide. Not the wisest. There’s gaping down the front, and the sleeves need an extra snap to keep it from being way too open. I also could stand to take the shoulders in a bit, they’re too wide and and it looks sloppy. Speaking of sloppy, one of the sleeves is absolutely sewn on backwards. Whoops.

You never realize how much you slouch or how awkwardly you stand until you see yourself from behind.

All and all, I’m pretty stoked on this shirt. I’ve worn it at least six times since I made it, I’m actually wearing it right now! I have another sitting at home waiting for snaps, look for it in the coming weeks. Happy sewing 🙂