The Tank that Almost Wasn’t (McCall’s m6359)

The Tank that Almost Wasn’t (McCall’s m6359)

Weird smiles.
Weird smiles.

When I first started sewing again, I made my first garment with my dear friend Amy. After the nightmare that was that dress, I thought I would try this simple knit tank. Easy, right? WRONG! At this time in my life, I was sewing on a base model machine, with no knowledge of how to work with knits. What’s worse, I had no clue about pattern fitting. I was hopeless.
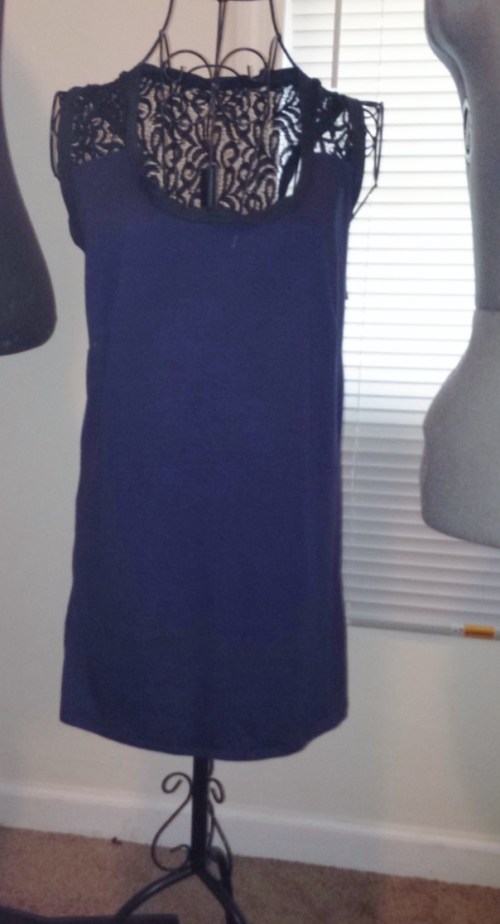
Lucille is drowning in it!

I remember when I was originally sewing this, the fabric kept getting sucked into my machine. The stitching just seemed off (zigzag stitching and a ball point needle MAY have been helpful 😉 ) The bust darts were too pointy. Using bias tape for the first time, I found it to be wavy and unsightly. In my frustration, I shoved this thing into the bottom of my scrap fabric tote, never to be seen again. That was until I stumbled across the pattern, while browsing the McCall’s site. I’ve sewn plenty of knits now! My machine is much improved! I have ballpoint needles! I HAVE A SERGER! Out came the old tank!

Please pretend you can't see my bra.
Please pretend like you can’t see my bra.

The pattern had been lost long ago, so this was all improvisation. First things first, take in the sides. I was on my way to Amy’s to sew on this particular day, so I did this quickly and without a second thought. I quickly pinned the sides down, turned it inside out, and ran each side through the serger, using the furthest seam line guide on my machine. It fit!!! Perhaps not in the way the pattern intended, but still in a way that I liked. My second step was was to fold the bias tape over, on the inside of the garment, to give it a stable, less wavy finish.

Also please ignore that ridiculous neck tattoo and my love handles.

That was it, folks! Just a few alterations and this garbage tank is in regular wardrobe rotation. Originally, I had intended to use this embarrassingly simple pattern to make old band shirts wearable again. Now that I’ve conquered it, perhaps you will see a few embarrassingly angsty but modified band shirts on the blog (looking at you, extra large the Get Up Kids shirt).

Happy sewing 🙂

Back with a peplum

Back with a peplum

I am the worst at posing.

Holy hiatus!!!!! My apologies for my absence, life has been very crazy lately. But we’re settling back into normalcy now, and spring is here (aka sewing season). It doesn’t hurt that my mentor started a sewing bloggers group on Facebook this week,either. So…about the sewing. I’m in love with the Simplicity 1425. I stretched it out over three days of lazy sewing, but it could easily have been completed in one day. That’s including all the alterations I made. I will absolutely being sewing this one again.

Speaking of the some alterations, let’s get down to that. I cut the lace for view E, and cut the black lining for view B. To be blunt, I just love a bit of cleavage. For the pleats, I decided to sew the lace and black cotton together, so as to not have an overly poofy peplum (almost like an underlining). NOW, Simplicity calls for three buttons to hold this bad boy together. THREE! Fuck that noise, I have no faith in buttons to keep me from being naked in public. Based on what I saw seemingly every other sewist do, I decided to do an exposed separating zipper in the back. This baby is secure. The neckline is just serged, and will be eventually treated with bias tape. My lace has a scalloped edge, so I left that as is. I feel like all this black needs that touch of femininity, ya know?

Seriously, what am I supposed to do with my hands?

Buying fabric in my area is a sad, sad endeavor. It’s basically Joann’s or Hancock. Also, I’m just absurdly cheap. I’m telling you this to justify making this top from the cheapest quilting cotton in my stash, and lace leftover from a previous project. Despite all of that, I like the way this top came out. Admittedly, I need to do some fitting here. There’s puckering in the back needs love, and the waist needs to be a bit more fitted. Give this pattern a go, I’m sure you’ll love it!