Maxi Sewalong-My Dress (By Hand London-Orsola Dress)

Maxi Sewalong-My Dress (By Hand London-Orsola Dress)

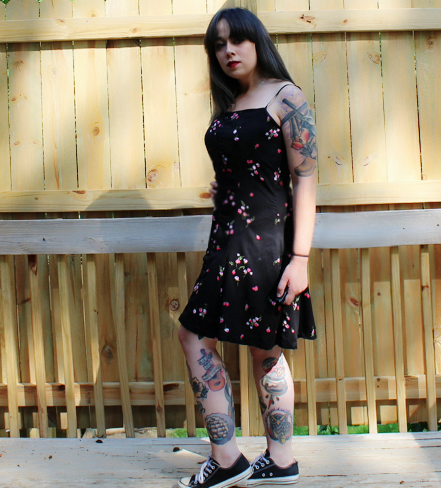
I can’t believe I’m saying this, but #maxisewalong2017 wraps up tomorrow!!! Get your makes in by noon Eastern time for a chance to win a pattern from By Hand London or a $50 gift card from LA Finch Fabrics. Speaking of those lovely folks, let’s talk about my dress…

I took these early in the morning, pardon the puffy face.

As I mentioned last week, I opted to use the Orsola dress pattern (lengthened) and some very lovely rayon from LA Finch Fabrics. I toyed with the idea of changing up the skirt portion, to kind of of give it a similar shape to last year’s maxi, but opted to keep the original shape. I’ve been sewing a lot of 70’s style wrap dresses recently (you’ll see those soon), so I kinda wanted to switch it up with a more modern look.

To get a maxi length, I added 23″ inches to the skirt portion. There are no guidelines for where to lengthen the Orsola, so use your best judgement. Anywhere between the notches and where the skirt curves should be fine I’d think? It was a bit difficult to measure myself for this, admittedly the skirt is a bit too long. I have on heels in these photos but it still needs to taken in a bit. I also opted to skip the skirt facing, purely out of laziness. Let me tell you, BHL put a skirt facing in this pattern for a reason. Getting this hem to lay flat was a BITCH, and in some places, it really doesn’t even do it. Whatever dude. I also opted to skip the stay stitching on the bodice, ร  la Elisalex, to give the back a bit more drape and flow. Thanks for the inspiration, lady!

My favorite part

I used two different rayons for this, a solid black rayon challis and a lovely rayon voile. I love love love these! The challis has a bit more structure and it isn’t quite as drapey or silky. While the voile has more drape and feels heavenly, it frays like crazy. The challis also presses a bit better than the voile. Both are lovely, luckily I have enough left over to make tops from each!

I really enjoyed this make, and of course, this sewalong. I really hope you’re all enjoying it too! Check out Instagram tomorrow around 3:00pm Eastern time, I’ll be doing a live drawing for winners. As a last reminder, submissions are due tomorrow, July 27th, at noon Eastern time. You can submit your makes by using the tag #maxisewalong2017 on IG, posting in the Facebook group, or e-mailing me directly. As a note, if I haven’t liked or commented on your maxi posts on social media, I haven’t seen it! Please make sure your account is public, and feel free to tag me, sewnbyashley. Happy sewing ๐Ÿ™‚

Maxi Sewalong-My Picks

Maxi Sewalong-My Picks


We’re just 8 days away from the end of our sewalong! ย I’m blown away by the submissions so far, you guys have some serious skills. ย Last week we went over somefabric ideas, and the week before, pattern ideas. This week, I felt like it was time to finally talk about what I’m making, along with some options that were so nearly chosen. First off, pattern…

Surprise surprise, it’s from By Hand London. It may seem bias because they are fabulously sponsoring us, but if you follow my posts at all, you’ll notice the bias is nothing new. Orsola fits in so beautifully with my summer wrap dress obsession, it was really a no brainer. That said, Orsola does not come drafted as a maxi length dress. I will be lengthening the skirt, and maybe altering the shape a bit ร  la last year’s maxi. But then again, maybe not. I do think Orsola has a beautiful skirt shape, there’s something more “grown up” about it to me. What do you guys think? I have 8 yards of fabric, so definitely enough to do whatever! Speaking of fabric…

I opted to use two fabrics from LA Finch Fabrics, another fantastic sponsor. I had a really hard to choosing fabrics and resisting my natural urge to wear all black. As a compromise, I decided to do the bodice in a very nice black rayon challis and the skirt in the lovely rayon viole pictured above, which appears to be unavailable at the moment. Blargh! When I told you guys I was obsessed with rayon, I wasn’t lying!\.

Originally, I’d planned to do the Anna dress in the black rayon challis I mentioned above, with some neckline embroidery. Being totally honest, I decided against Anna because I was afraid of embroidering rayon. I’ve not done much of it, and I just don’t quite have the balls yet. I also toyed with the idea of doing Anna in a print, such as…

This blue rayon challis. I love the print and the geometric design, but in the end, blue + geometric was just too far out of my comfort zone. What can I say, I’m a creature of habit!

To see everyone’s makes so far, check out our Facebook group or Instagram, I’ll be sharing your makes all through out the sew along. #maxisewalong2017 wraps up July 27th 12:00pm eastern time, so get your submission in before then for a chance to win a prize from Finch Fabrics or By Hand London!! Stay tuned for the live prize drawing next week! Happy sewing ๐Ÿ™‚

The Watergun Fight Dress (By Hand London Orsola Tester)

The Watergun Fight Dress (By Hand London Orsola Tester)

I don’t know what to do with my hands. Again.

I’m deeming this the summer of the wrap dress. I love how comfortable they are to wear, and how easy they are to make. They’re super flattering, and can expand a bit if I go too hard with the snacks, which I absolutely will do. They can be fabric hogs, but that’s a sacrifice I’m willing to make. Orsola isn’t such a fabric hog, she comes in around 4 1/2 yards I think, including lining. Not too shabby!

Plus, it’s great for jumping.

I was super stoked when I got the email about this pattern! The back is just the perfect little bit of sexy. Originally, I’d planned to make this with a sari I’d ordered of Ebay. HOWEVER, that thing was straight up hot garbage. The fabric felt like that Halloween costume fabric, if you know what I mean, and upon washing, the fabric dye bled everywhere. Straight to the garbage with that! Bless Amazon and this lovely Cotton + Steel fabric! In two days, I had a gorgeous rayon, though I kinda wish I’d gone for the dark blue. The only trouble was that I’d stupidly ordered three yards. There was NO fabric for the lining! Last minute shopper that I am, I had zero time to make it to the only store in my city to carry this fabric. Soooo I ended up at Joann, and boy was that a mistake. Somehow, they had no solid black rayon challis, weird, right? I ended up with a polyester crepe, much to my disappointment. Oh well, moving on…

That back, though.

Orsola sews up fairly easily, though you should be prepared for quite a few darts! I’ve never minded darts, but if you do, prepare yourself, because it has about 18. Orsola also features a fully lined bodice, and a skirt facing. I’ve never sewn a skirt facing before, and I was skeptical. I loathe facings, they’re floppy and annoying and should be avoided at all costs. That said, I actually like this one. It adds a bit of weight to the hem, and it seems to help it lay prettily. I opted for the tulip skirt version, which is really not much of a change for the straight skirt. I also failed to understitch the bodice lining, which was DUMB. DUMB DUMB DUMB. Bad self.

Side view, sans face.

I had some picture taking woes with this one, but luckily my friend Michelle and her lovely wife stepped up and shot them for me, some of the photos feature their absolutely adorable daughter, Tiger Lily, so don’t be confused by the child. She was so fun! Afterward, we had a bit of a watergun fight, my eyeliner was a bit worse for the wear lol! Photo dump below, I hope you enjoy Orsola, I’m looking forward to making many more. Happy sewing ๐Ÿ™‚

The Return from Hiatus (By Hand London Poppy Dress)

The Return from Hiatus (By Hand London Poppy Dress)

Pre-haircut times.

Holy hiatus, it’s been awhile since I’ve shared anything with you guys. I’m so sorry! Between looking for a house and actually moving, things got a little crazy there for a bit. In my defense, I’d actually had this done for a bit, but (obviously) wanted to wait for the pattern release to talk about it. The pattern is The Poppy Dress and Top from By Hand London, and I’m super stoked to talk about it, let’s get into it.

Butt view

Poppy is a knit pattern, very much of the “secret pajamas” type. I’ve dressed it up for work and dressed it down to walk the dogs, it really is very versatile in that way. I made both the t-shirt (with the short sleeve option) and the midi version, but there is also a maxi version I’m dying to try out. The pattern features really lovely box pleats on the sleeves, and fish eye darts for waist shaping. As a tester, I omitted the fish eye darts on my versions.

T-shirt version!

For both the dress and shirt, I used this super soft, very cozy Merino jersey in Marsala graciously provided by The Fabric Store. Easily the most expensive fabric I’ve ever sewn, I can honestly say it’s worth it. Though it is a very lightweight knit, it sews beautifully and I didn’t have the usual struggles with it getting sucked into my machine. It seems to hold it’s shape, as well, without bagging out or “growing” as the day goes on. So nice!

Ok so maybe my jeans were a little snug.

Poppy is fairly easy to sew, but in full honesty, I struggled with the neckline. I’ve never sewn a neckband in knit, and just could not get it to lay flat! Talking to other sewists, it really seems like this is just my in experience. The current version is much better than my first attempts, but still not great. This pattern also marked my first attempt at using the double needle on my machine. I know that seems odd, but I’ve truly been terrified of it! I completely convinced myself I was going to do irreparable damage to my machine, somehow. Folks, I am an idiot. Using a double needle is super easy and gives a nice little bit of stretch to the hem. WHY HAVE I BEEN FINISHING KNITS WITH A SINGLE NEEDLE!?! Dumb dumb dumb.

The sun was SO BRIGHT

I kinda wish I’d sewn the fish eye darts, they’re what attracted me to the pattern in the first place. Maybe I’ll attempt to add them, but even without them, I seriously get comments on this every time I wear it. That’s high praise for a dress I’ve gotten drunk and slept in more than once! I hope you consider the Poppy, and I look forward to sharing more with you soon, maybe without a two month gap. Happy sewing ๐Ÿ™‚

The Purple Rain Dress (By Hand London Flora Dress)

The Purple Rain Dress (By Hand London Flora Dress)

The aesthetic of these photos is a lot more “goth-ish hipster in a basement” than I intended.

It’s been awhile, hasn’t it? My apologies for that, January is not my favorite month. Now that we’re through with apologies, the dress. The pattern is the Flora Dress from By Hand London. I’ve made it before, and you can see some pretty terrible photos of that dress here. We all know I have a love affair with this pattern company, and also cleavage, so it was only a matter of time before I made this again.

Cameo by the camera battery charger.

For this version, I opted to use this stretch velvet I found at Joann. Velvet seems very on trend lately (have I ever been on trend?), and I’ve recently started a love affair with stretch wovens. Since making my Christmas party dress in stretch satin, I feel like I’ve entered a whole new world. No zippers!! Satin and velvet are both difficult fabrics (MORE ON THAT SHIT LATER), so I jumped on the chance to avoid trying to install a zipper.

Look ma! No zip

The Flora dress has a lined bodice, and I really debated on what to use. I didn’t want to use the velvet because boob sweat is a thing, but I still needed something with stretch. In the end, I opted for the previously mentioned stretch black satin. Folks, that was a fucking stupid choice. Imagine, if you will, sewing shifty velvet to slippery satin. I shouted. I drank wine. All to no avail. In the end, I had to concede that my sewing skills were just not really up to the task, and accepted some garment flaws. I REALLY wanted to finish this garment, you guys, so I refused to be defeated. Now, you may be thinking to yourself “But Ashley, it’s not finished! You haven’t even hemmed it!” You’d be right. I was a good sewist and let it hang over night, with every intention to hem it the next day after work. But…I just wasn’t up to it. You see, velvet needs to be hemmed by hand, and we all know hand sewing isn’t my favorite. I will mostly likely even out and hem Flora this weekend, I swear.

Wiiiinnnnnnnnneeeeeeeeeee

For construction, I just did everything from memory, I didn’t look at the instructions at all. I assembled the bodice and lining, except for the side seams, and then attached them along the neckline and armholes. I then pulled the fabric through and stitched the side seams in one long seam. Easy peasy. I cut a US 10, which is my usual size in BHL. Normally I shorten the straps, but here I didn’t, I think they’re ok. When it came to basting the front bodice pieces together, I totally ignored the pattern markings. I slipped the bodice on, and just went with what I was comfortable with. Kind of just overlapped them and pinned it in place.

I somehow took no side view photos of this, my bad.

For the skirt, I sewed the pleats and attached the pieces as normal, except for the zipper situation. When it came time to attach the skirt to the bodice, I broke my walking foot 😭 I’ve gotta stop buying cheap shitty ones off Amazon. As a consequence, the side seams and pleats don’t really line up. WHATEVER MAN. I also struggled with finishing the waist seam, because velvet+lining+darts+pleats=mega bulky seams. I tried to trim the bulk as well as I could and hand turned the wheel through the rough bits.

In addition to no side views, I also set my tripod WAY too low. Well done, self.

Speaking of bulk, I think all those folded and wrapped layers make the waist area look bulkier than it should. If I was a smart girl, I would have slashed the darts open and trimmed the bulk then. I did not do that, because derp. I’m super self conscious about my waist size anyway, so this added bulk was really bumming me out. To combat that, I put a corset on underneath my dress. Not only did it help my waistline, it also made my boobs look extra fantastic. Overall, I don’t hate the results. It’s not the best made garment, but for something to get my out of my sewing funk, it’s not so bad. It’s good to have my sewjo back!! Happy sewing ๐Ÿ™‚

Sequin Party Dress (By Hand London Charlie Dress)

Sequin Party Dress (By Hand London Charlie Dress)

Will I ever learn to smile? Probably not.

Sometimes, I wonder what life is like for people who don’t do every single thing at the absolute last minute. For about three weeks, I knew I wanted to make a sequin and satin dress for my work Christmas party. Naturally, I started it two days before the party, even though I have no experience sewing sequins. Super smart, right? It’s truly a miracle that this dress is even mostly finished.

Cold, dead eyes.
Cold, dead eyes.

I wanted to use a fairly simple pattern for this, I really wanted the fabrics to be the focus. The lovely ladies at By Hand London were kind enough to gift me with their Charlie dress pattern, and it just seemed perfect. I opted to make variation 2, with the 3/4 circle skirt. I also left the bodice band off, I can never get those to lay right on me. Since I was using satin, I decided to line the bodice for some structure. I shortened the straps a bit (which I normally do), and hacked about three inches of the skirt length. Easy peasy!

blargh.
blargh.

Now, the fabric. For the main fabric I used this stretch satin, and I am SO glad I did. Why? Because it had just enough stretch that I didn’t have to put the side zip in!! Really, really wasn’t looking forward to sewing a zipper into that sequined skirt. Very stoked. For the sequined fabric and the straps, I’m afraid I have no fabric links for you. Both were gifted to me by my dear friend Danielle, and I have no idea when or where she got them. Sorry!! I can tell you I’m wearing this petticoat here, and it’s fantastic. Just the right amount of body.

img_1014

For the most part, I followed the pattern instructions. Charlie is a very straight forward pattern, I can’t imagine how to muck it up. For the straps, I assembled them as directed, and then tacked the rose trim down every two roses. I have no idea if this is the correct way, folks. I also realize I have no decent pictures of them, my bad! To attach them to the bodice, I just sandwiched them between lining and bodice, right sides together, stitched and pressed. For the skirt overlay, I basted the sequin fabric to the satin, wrong side to right side. Then I just sewed them as one. Hopefully at least some of that made sense? That’s really all I have to say on it, it’s truly very simple. I have a few more photos below, happy sewing!

img_1016

img_1018

img_1022

Alix Dress Pattern Tester (By Hand London Alix Dress)

Alix Dress Pattern Tester (By Hand London Alix Dress)

Prancin' around
Prancin’ around

Sewing time has been very limited for me as of late, but I always make time to test for my favorite pattern companies. When By Hand London, sent over their Alix Dress, I was super stoked to cut into it! Alix comes in three lengths (tunic top, minidress, and maxi), I opted for the maxi length. Generally, I do believe shorter is better, but a can wear a maxi length dress to work without have to put on tights! For me, that’s just fucking fantastic.

Really showing off my Dumbledore nose here.

Alix is definitely a style departure for me. She has a definite 70’s feel, with billowy sleeves and a flowing skirt. The sleeves and flowing skirt are so comfortable, though. The bodice is lowcut, but not too lowcut, just enough. There are no zippers or buttons here, the wast ties give it shape. It still feels so elegant though! We’re talking next level secret pajamas here.

One strand of uncurled hair, as per the usual

I followed the pattern almost exactly, cutting a US size 10 (UK 14), and adding my standard 2″ to the sleeves. Oh and pockets, of course I added inseam pockets. I used black poly peachskin from Joann’s, which is not exactly the ideal fabric for this. Head to toe poly? Yikes! But it was the only black swishy fabric I could find in the appropriate width (maxi length requires a wider fabric), so I made due. It’s actually not bad for fall, though in the spring and summer, I’d prefer a rayon, perhaps.

Always fiddling with m skirt

I almost wish there was a bit more room in the bust, I will probably add that for my tunic version. Other than that, I have no problems with Alix! The directions were easy to follow and as detailed as always. It’s super comfortable to wear, yet still elegant. I wore mine out last night for a witch-themed charity event, and got so many compliments. Are you planning to sew up an Alix dress? Happy sewing ๐Ÿ™‚

An Unpopular Pattern (By Hand London Sabrina)

An Unpopular Pattern (By Hand London Sabrina)

Pretend you don't see a remote
Pretend you don’t see a remote

I rarely ever research a pattern before I buy it. I know a lot of sewists do, and perhaps I should, but I don’t. So when I saw the Sabrina dress from BHL, I snapped it up without a second thought. I’d been searching for the perfect pattern to use with Gertie fabric, and this gave me beautiful 90’s nostalgia. So imagine my surprise when I finally searched and found almost no reviews…

No, the back isn't uneven, I'm just standing weird again.
No, the back isn’t uneven, I’m just standing weird again.

What’s with the hate, sewists? The pattern is fairly straightforward, alterations are easy. In this rayon, it’s light and breezy, perfect for summer. Putting it on, I immediately wanted Dr. Pepper lip smacker lip balm, glittery eyeshadow, and platform shoes. I wanted to sit in an inflatable chair and watch Friends. How could any of that be so bad? Is it the buttons? I’ll admit, when I saw the pattern call for 30 buttons, it seemed a bit daunting. In reality, though, I could only fit 14 on the dress, and my buttons were pretty small. What gives, folks?

Forever awkward.
Forever awkward.

To be fair, I did make some slight alterations. Once the dress body was assembled, the dress gaped too much under the arms. To remedy, I just made a dart at the top of the side seam, if that makes sense. I added pockets, albeit too low pockets. It’s a fairly common mistake for me, but sometimes I place my pockets at the most comfortable place. I have fairly long arms, so this is rarely flattering, they should really be several inches higher. I also omitted the facings, because I hate facings and I try to take them out whenever possible. I’m not a big fan of creating thin straps, either, so those had to go as well. I lieu of the facings and straps, I have thin bias tape. I bound the neckline seams with bias, and extended it up to create straps. Quick, easy, and it didn’t cause me to lose my temper. Win win.

A bit closer up.
A bit closer up.

The placket was the only thing that really threw me for me a loop here. I’ve never sewn a placket without using interfacing, and this dress calls for none. I wasn’t really sure how well my machine would handle buttonholes on uninterfaced flimsy fabric, but it went flawlessly. I think I will probably nip the waist in a bit more, but overall, it’s a great, comfortable dress. It’s been oppressively hot and humid in Ohio lately, but I stayed as cool as possible all day in this. Really, you guys, what gives??

Dog Dress 2 (By Hand London Kim Dress)

Dog Dress 2 (By Hand London Kim Dress)

Meet Albus!
Meet Albus!

If you follow me at all, you know I’m obsessed with dogs, and especially my own, super handsome furry friends. The moment I saw this fabric online, there was no chance I was passing it up! It’s dogs in fucking bow ties, people, everyone needs this fabric! That said, it’s quilting cotton, albeit a lightweight cotton, so it’s not the most luxurious of fabrics…

Picture taking is 100% more fun when dogs are involved.

While I love this print, I really didn’t want to do a full dress with it. I think it would be a bit overwhelming, and I like to use fabric with a teensy bit of give for bust areas. I have several yards of black stretch sateen laying around for my Halloween costume, so I opted to borrow a little from that. In my mind, the sheen would help keep the dress from looking like it was made from curtains, but still keep the focus on the cutesy print.

Yes, there is dog hair on the bodice.  Deal with it.
Yes, there is dog hair on the bodice. Deal with it.

Keeping with that train of thought, I wanted to use a fairly simple pattern. It took me awhile to finally decide, but I settled on the By Hand London Kim dress. I’ve made it before, and really like the look of it. That said…last time I really struggled with the fabric. It wrinkled like mad, and just really did not press well. As a result, it just looks kinda sloppy, all the time. Frustrating, ya know? This effort was much better, with sateen and quilting cotton being some of the easiest fabrics to press. For this version, I shortened the straps a bit (could have shortened them more!), and didn’t take the bodice in. Previously, I had taken it in a bit, and I kinda wish I had again. I like a tight bodice, and I shouldn’t give into pressure to do things any other way! Lesson learned.

I know you can barely see the dress here, but come on. HE'S SO HANDSOME
I know you can barely see the dress here, but come on. HE’S SO HANDSOME

For the skirt, I went with a modified version of variation 2. I cut the pieces as instructed, but went with pleats instead of gathers, as is my preference. Just like with my last skirt, I used the bodice and my cutting mat grid as a guide. This time, my pleats are four squares (inches), with two inches separating them. No reasoning for that, just what I felt like doing, folks. I also added pockets, again using markings on the selvage as a guide. I know I should cut off the selvage, but…I like it.

Pleats! Also...I really should have put a red bowtie on Albus. Derp.
Pleats! Also…I really should have put a red bowtie on Albus. Derp.

I finished the zip right before photos, and totally didn’t realize how wonky it is. When I fix that, I will definitely tighten up the bodice a bit!! Also, I find that my shoulders always look wide in blog photos, but according to my measurements and the way every top has ever fit me, I don’t have even slightly wide shoulders. Has anyone else experienced this? How do you rectify it? Am I just standing weird again? HELP ME!!

Seriously, my shoulders are not this wide.

Overall, I really like this dress. I know I say that in nearly every post, but I mean it. Plus, I’ve found that the By Hand London dress block fits my shape best, within minimal alterations. Perfect, right? If I can get by with wearing dog faces on my clothes at work, this will go into the weekly rotation, and I can’t think of higher praise than that! I’ll leave you with one more picture, because I have actual decent photos again. Happy sewing ๐Ÿ™‚

Sex eyes.
Sex eyes.
Not a Batman Shirt (By Hand London Sarah shirt tester)

Not a Batman Shirt (By Hand London Sarah shirt tester)

There are no words for how cold it was this day.

I was super stoked when Elisalex of By Hand London invited me to be a pattern tester. I was even more excited when I realized the pattern was the Sarah Shirt! If you follow me on Instagram, you know I’ve been in a bit of a shirt sewing frenzy. Recently I’ve done three flannels and two shirt dresses, with plans for at least four more in 2016. Perfect timing, ya know?

What up, black bra.
What up, black bra.

The Sarah shirt is a different than my flannels, for obvious reasons. Designed for soft, lightweight fabrics, it’s flowy and undeniably feminine. The pattern comes in a short sleeve and long sleeve variety, with collar differences. One of my goals for 2016 is to sew more work-appropriate clothing, so I opted for the long sleeve version. Also different, there is no collar stand used in this pattern! Combined with the rounded collar, no-fuss sleeve binding and cuff, the Sarah shirt is much less intimidating for beginner shirt makers.

Cool pleating looks off center, but…it’s not, promise.

Now…the fabric. It’s the Blue Bat Peach Skin from Girl Charlee. I have to admit, this fabric has a lovely hand and feels so luxurious against the skin. That said, I rarely sew with fabrics this lightweight, and man, it was a fucking bitch. It would shift every time I tried to cut it and flail wildly during sewing. Also, it shows pinholes, badly. All of this would probably not be news to someone accustomed to sewing this type of fabric, but I am not that person. At all. I also struggled with the buttonholes. My machine was just not having it, so…snaps it was! The button placket could be a lot smoother, but I’m blaming the button tragedy for that. I also struggled a bit with pressing. Recently, one of my dogs thought it would be cool to chew the plug off my iron. How nice! I’ve been using a very old, possibly antique backup iron while I figure out which iron to buy now. The backup doesn’t have a steam option and it’s a bit harder to get the temperature right, so I’m sure that has plenty to do with it. Iron suggestions are welcome!! Seriously, I have NO IDEA what to get. EDIT: I forgot to mention, I did French seams on this one. Ultra lightweight fabric=French seams, always. Derp.

Side view, always my least favorite.

I cut a UK 10/US 14 as the pattern directed, based on my measurements. As this is a loose fitting top, I’m sure you could cut a smaller size or grade it, for a tighter fit. I made no alterations to the pattern, as I wanted to test it as-is. That said, I should have added length to the arms, and perhaps the bodice. This is a standard alteration for me, and may not be necessary for you. Other than that, the fit was pretty spot on. I really like the look of the front pleats, and it’s so comfortable. I’m already picturing future Sarah shirts! Happy sewing ๐Ÿ™‚