A Wearable Muslin & the Sewing blahs (Grainline Morris Blazer)

A Wearable Muslin & the Sewing blahs (Grainline Morris Blazer)

This post contains my bitches faces yet.

Have you ever just completely lost your will to sew? You’re halfway through a garment and just can’t bring yourself to finish it? Let’s say that you have. What’s up with that!?!? I’d been wanting to sew this Morris Blazer for quite sometime, and it’s not particularly difficult sew, why get so blah about it? I’ll admit that it is a bit boring in plain gray, and I really don’t love sewing knits, but still!

Swear I'm going to stop posting pictures of the backs of garments. Ugh.
Swear I’m going to stop posting pictures of the backs of garments. Ugh.

I opted for plain gray for this, because I wanted to wear it to work. I cover up my arms everyday, so I needed something that would blend with multiple garments. Originally, I had planned to wear this to the Brian Fallon show I went to in Chicago, but I really dragged my feet and didn’t get it done. Instead, I wore the peplum top I made 23984783974 years ago. Btw, if you’re interested, I met a photograph who took fucking FABULOUS photos of that show, which you can see here.

We also took cheesy bathroom photos because it made our eyeballs look weird.  But hey, lace peplum!
We also took cheesy bathroom photos because it made our eyeballs look weird. But hey, lace peplum!

Back to the blazer. Since I was afflicted with a terrible case of the sewing blahs, I kinda rushed this. And as the fabric is a gray ponte I got at Joann’s for a steal, I decided to just treat this like a muslin. Which, in a way, was fortunate, because I have a few changes to make. For starters, the shoulders are too wide and need to be taken in a bit, which I really need to remember to do on anything with sleeves. The sleeves are also too roomy for me and will have to be taken in. I’d add 1-2 inches to length overall, except for the sleeves, where I’ve already added 3 inches. I think it would be a bit sturdier if it was fully lined, and clearly, I need to do a better job sewing it. Those sleeve gathers are awful, and the top stitching is complete shit.

"Wow, that's some wonky stitching"
“Wow, that’s some wonky stitching”

I don’t blame the pattern for any of the issues, it has definitely been a user error! And I’ll absolutely still wear it to work, of course. I really do wear all my me-mades, even if they’re kinda garbage. I have some fun things to sew soon, so hopefully I can kick the sewing blues. Also, I know I haven’t posted lately, but I swear I’ve been sewing. Check out this quick skirt I made for St. Patrick’s day, based on the By Hand London Kim dress!
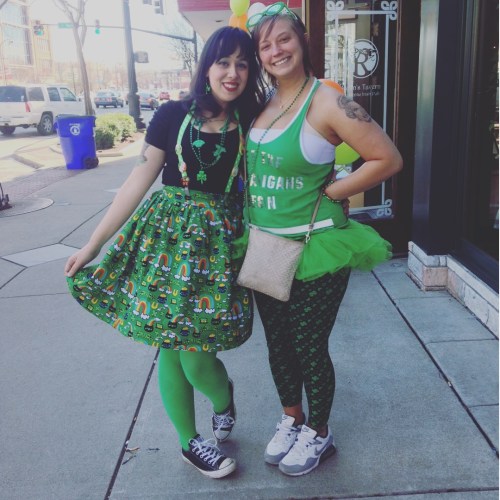
Forever awkward.
Forever awkward.

It’s fun, right? Hopefully my next post brings us back to quirky fun sewing projects. Also, progress posts on my Halloween costume are coming soon, so that’s exciting. Happy sewing πŸ™‚

Nita Wrap Skirt (Sew DIY pattern tester)

Nita Wrap Skirt (Sew DIY pattern tester)

Early morning picture taking gives me bitch face

I’ve been wanting to make more skirts lately, so when the opportunity to test the Nita wrap skirt for Sew DIY came up, it seemed like a no brainer. The pattern (when released), will come in three lengths, mini, midi, and maxi. In a move that was a surprise to precisely no one, I chose the mini. Midi lengths look awkward on me, and the mini seemed just long enough to wear at work, with tights. As for the maxi, that I’ll save for summer.

Way to be awkward, self.

For maybe two years, I’ve had this navy poly satin sitting in my stash. A look back at my old Fabric.com orders tells me that it’s called Roselyn satin, though they have none remaining on their site. I really like this fabric, it’s more of a medium/heavy weight material, and therefore sews beautifully. I usually avoid satin, as I really hate flimsy, slippery fabric. Also, I felt like a sturdier material would give this a bit of a Clara Oswald feel. I have no idea why I think that, honestly.

The most unflattering angle.

Navy fabric is really hard to photograph when you’re no good at photography, btw. I feel like you can’t see any of the details or really anything at all. Very frustrating. I did try to edit them a bit to make it more visible, hopefully it worked. I really actually like the skirt!! I was just kind of winging it on the button placement, so that’s not as good as it could be. Based on my waist size, I cut a size 12, and opted to make the lined version. I used the same fabric for lining, as it’s a wrap and you can sometimes see the insides. I think I should have used a thinner fabric, it has a bit too much volume as is. I toyed with the idea of doing an unlined version, and finishing the insides with black bias tape. Totally should have done that!

SO BITCHY

I’m actually wearing this skirt right now, so I’m calling it a success. I’m not someone who needs things to be perfect, I just have to like it. Stay tuned for the pattern release, it should be coming soon!! Happy sewing πŸ™‚

Fail February-A Harry Potter dress (Simplicity 1418)

Fail February-A Harry Potter dress (Simplicity 1418)

Just casually reading, no big deal...
Just casually reading, no big deal…

You know how sometimes you just get SO EXCITED to work on a project that you completely ignore all the warning signs? That’s what happened here. When I stumbled upon some Harry Potter fabric at Joann’s in December, I was crazy stoked. I have been looking for this stuff for years, so it was a big deal folks. As soon as I got home, I grabbed a pattern that I thought would work and immediately started.

You know you're excited about something when you take cart pictures.
You know you’re excited about something when you take cart pictures.

The pattern I grabbed was Simplicity 1418, and I’ll be honest, I knew it was the wrong size when I cut it. Based on my bust alone, I should have been between a 14-16, the largest size I has was a 12. But hey, the big 4 always run a bit too big, right!? I could grade the seams and it would totally be okay, I said to myself. LIES!!! Who cares that the fabric is crummy quilting cotton, with absolutely no give. This would magically work.

IMG_7905
It didn’t.

This dress is WAY too tight. I’m an hourglass shape, but I somehow managed to make my bust look minuscule here. The shoulder pleats on the dress are truly lovely, but this ill-fitted one sits horribly and causes my shoulders to look extra wide. I’m sure it doesn’t help that I decided to forgo facings and fully lined the entire bodice, sleeves included.

At least the cute back detail is kind of almost okay?

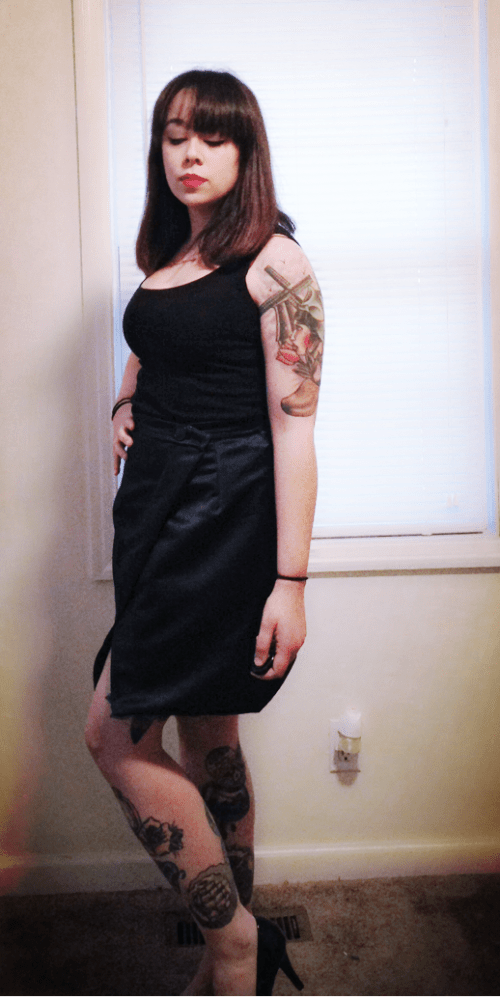
Notice how I said I started this dress in December? Well, that’s when I finished it. Once I realized the travesty I’d created, I threw it in the corner and pouted for two months. Enter Sew Red-y’s Fail February. What a fun idea! If Rachel can show her fails, why couldn’t I? I’m still super stoked on the fabric, and hey, and least the length is right? Looking at it in a positive light, it’s a reminder of why it’s important to sew slowly. This dress could have been saved if I’d used my brain and grabbed a pattern that fits, maybe even a TNT. I should have tried it on more often during construction, I should have made a fucking muslin. All ridiculous beginner errors. But hey, it’s still a Harry Potter dress, and I did wear it (semi-comfortably) for an entire day. Plus, I’m losing weight, so who knows, it could fit in the coming months. Whatever happens, it’s just clothes, and at least I can get a laugh out of it. Happy sewing! πŸ™‚

Flannel #2 (Sewaholic Granville/Sewaholic 1501)

Flannel #2 (Sewaholic Granville/Sewaholic 1501)

When you have dogs, your yard is just mud. Sorry.

This is my second go at the Sewaholic Granville, with more stash fabric. Again from Joann’s, again teal. What can I say, it was a phase. Though I think I recall these being from the same collection, this fabric is definitely a lighter weight, and therefore hangs differently. Blargh.

I don't know why my pictures are so grainy lately.
I don’t know why my pictures are so grainy lately.

The sewing is basically the same as my last Granville, with a few exceptions. Namely, I sewed the side seams at the recommended 5/8″, instead of the 1″ I’d done before. I thought maybe that would help with the gapping at the bust, but alas, it did not. I think that’s just bad snap placement. Or perhaps I should grade out there? Β Either way, I really don’t like the shape this creates. Β I think the combo of the fabric change and seam change made for a less flattering top. Β Fuck it.

The back view is always just me standing weird.

This version was also a good bit rushed, as I wanted to wear it to a concert. That didn’t happen. However, the rushing definitely shows in the finished product. The stitching is a bit wonky, and the collar hasn’t help up to washing. Don’t rush your sewing folks! Does anyone else have a tendency to set arbitrary deadlines and then proceed to stress out about it? It’s so silly!!

Pictured: wonky stitching.

I can say, cutting was not nearly as bad this time. I don’t know if that’s a credit to simpler plaid, having just done this, or both (probably both), but it was a much speedier process. I’m considering doing my next Granville in a knit, so that cutting process should be interesting. Any suggestions??

070
Does anyone else get bored taking pictures of themselves?

I really can’t think of anything else to add, I think I said it all last time!! I still love this pattern, and will make it again. Happy sewing πŸ™‚

Not a Batman Shirt (By Hand London Sarah shirt tester)

Not a Batman Shirt (By Hand London Sarah shirt tester)

There are no words for how cold it was this day.

I was super stoked when Elisalex of By Hand London invited me to be a pattern tester. I was even more excited when I realized the pattern was the Sarah Shirt! If you follow me on Instagram, you know I’ve been in a bit of a shirt sewing frenzy. Recently I’ve done three flannels and two shirt dresses, with plans for at least four more in 2016. Perfect timing, ya know?

What up, black bra.
What up, black bra.

The Sarah shirt is a different than my flannels, for obvious reasons. Designed for soft, lightweight fabrics, it’s flowy and undeniably feminine. The pattern comes in a short sleeve and long sleeve variety, with collar differences. One of my goals for 2016 is to sew more work-appropriate clothing, so I opted for the long sleeve version. Also different, there is no collar stand used in this pattern! Combined with the rounded collar, no-fuss sleeve binding and cuff, the Sarah shirt is much less intimidating for beginner shirt makers.

Cool pleating looks off center, but…it’s not, promise.

Now…the fabric. It’s the Blue Bat Peach Skin from Girl Charlee. I have to admit, this fabric has a lovely hand and feels so luxurious against the skin. That said, I rarely sew with fabrics this lightweight, and man, it was a fucking bitch. It would shift every time I tried to cut it and flail wildly during sewing. Also, it shows pinholes, badly. All of this would probably not be news to someone accustomed to sewing this type of fabric, but I am not that person. At all. I also struggled with the buttonholes. My machine was just not having it, so…snaps it was! The button placket could be a lot smoother, but I’m blaming the button tragedy for that. I also struggled a bit with pressing. Recently, one of my dogs thought it would be cool to chew the plug off my iron. How nice! I’ve been using a very old, possibly antique backup iron while I figure out which iron to buy now. The backup doesn’t have a steam option and it’s a bit harder to get the temperature right, so I’m sure that has plenty to do with it. Iron suggestions are welcome!! Seriously, I have NO IDEA what to get. EDIT: I forgot to mention, I did French seams on this one. Ultra lightweight fabric=French seams, always. Derp.

Side view, always my least favorite.

I cut a UK 10/US 14 as the pattern directed, based on my measurements. As this is a loose fitting top, I’m sure you could cut a smaller size or grade it, for a tighter fit. I made no alterations to the pattern, as I wanted to test it as-is. That said, I should have added length to the arms, and perhaps the bodice. This is a standard alteration for me, and may not be necessary for you. Other than that, the fit was pretty spot on. I really like the look of the front pleats, and it’s so comfortable. I’m already picturing future Sarah shirts! Happy sewing πŸ™‚

Flannel Shirt Attempt #1 (Sewaholic Granville/Sewaholic 1501)

Flannel Shirt Attempt #1 (Sewaholic Granville/Sewaholic 1501)

How many excuses are you guys willing to accept for poor photography?

I’ve always had a deep love of flannel shirts. Unfortunately, I’ve also always had crazy long Stretch Armstrong arms, and those two things just don’t go together. For some time now, though, I’ve been wanting to make one but have also been super intimidated by it. The plaid matching! The sleeve plackets! The collar! THE FEAR

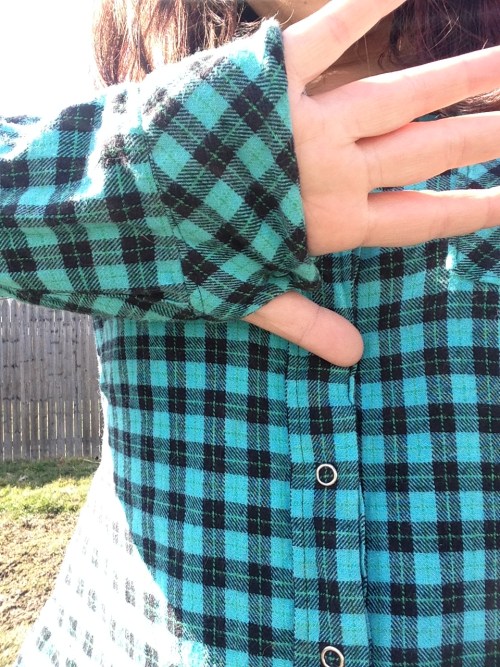
I also like to put my hands in my sleeves always.

I’ve had a few bits of flannel laying around for awhile, bought for a steal at Joann’s, so long ago that the fabric no longer appears to be available. I think it probably cost me about $3 a yard, so it seemed perfect for a wearable muslin. To do the plaid matching, I cut all my fabric on a single layer. I also cut one piece at a time, going around the body, using the piece I’d just cut to match the other, if that makes sense? Probably not the most efficient way to do things, but it was my plaid virginity and I wanted it to be good, dammit. That said, I did cut the pockets and yoke on a bias. With the seaming on the back, there was no chance of matching, and I just like bias pockets.

Not bad, for my first try at matching.

The pattern is the Sewaholic Granville, and it’s absolutely lovely. Tasia also has a super helpful sewalong on her blog, highly recommend. I cut a 10, which was actually a size down, but I wanted my flannel a little tight. I added two inches to the arms, and none to the body. Fun trick: I didn’t cut one front piece smaller or add a button placket. Instead, I cut both the same size, then pressed and folded the excess over (on the front) to create a placket look. I got the idea from Tasia, mine is a teensy bit different, but the same premise. I promise, it sounds a lot clumsier than it actually is. I omitted interfacing there, as I was using pearl snaps and didn’t think it was necessary. This was also my first try at flat felled seams, I think I’m in love. So clean looking!

Not the best photo, but check out those seams!

Speaking of snaps, I kind of disregarded the pattern instructions from button placement and just used my plaid as a guide. Not the wisest. There’s gaping down the front, and the sleeves need an extra snap to keep it from being way too open. I also could stand to take the shoulders in a bit, they’re too wide and and it looks sloppy. Speaking of sloppy, one of the sleeves is absolutely sewn on backwards. Whoops.

You never realize how much you slouch or how awkwardly you stand until you see yourself from behind.

All and all, I’m pretty stoked on this shirt. I’ve worn it at least six times since I made it, I’m actually wearing it right now! I have another sitting at home waiting for snaps, look for it in the coming weeks. Happy sewing πŸ™‚

A Failure in Photography (Butterick 6582, kinda)

A Failure in Photography (Butterick 6582, kinda)

This is the best picture of the bunch, seriously.

You’re going to see pictures from a variety of locations in this post, and that’s going to be confusing. I’m sorry about that, I really tried to get decent pictures. It just didn’t happen. I’m attempting to take blog photos without the aid of my friends, and clearly, there are still a few bugs to work out. Next week will be better, I promise! ANYWAY…

Tada!!! Awkward photography.

The dress is Butterick 6582, and the fabric is an absolutely lovely stretch sateen. I’ve had both in my stash for so long, I can’t remember where they came from or when they were purchased! The pattern calls for light weight fabrics, but I just can’t get on board with the drapey fabrics tight on my midriff. Never going to happen. Based on the reviews, I also lowered the neckline a bit, but I think I should have lowered it even more. With the print, I still think it looks a bit matronly, you know? Not exactly my aesthetic. This pattern also features lovely double pointed darts, which I think are also a bit lost in the print. It was a bad fabric choice, that’s what I’m trying to get at here. Never rush your sewing choices, folks.

Looking for the darts makes my eyes hurt.

For this pattern, I cut a size 12, which is pretty standard for me. I raised the hem about three inches, as I don’t think the longer, intended length is flattering on me. As mentioned, I lowered the neckline, and I must admit, it was a bit unsuccessful. You see, I made this dress for a work Christmas party, and I was rushing to meet the deadline. Again. I didn’t put enough time into getting it just the way I wanted. Between the botched neckline and the stiffer fabric, it has none of the intended drapey-ness. It’s a bummer.

Some pretty serious derps, but check out those shoes, though.

The pattern is fairly easy to put together, as it’s only four pieces plus facings. This was first time sewing double pointed pleats, and I love them. They’re so flattering, even if you can’t tell in any of this pictures!

II swear, I actually do have a neck. Stupid hair+shadows.
I swear, I actually do have a neck. Stupid hair+shadows.

While I doubt I’ll sew this pattern again as is, I would consider doing it in a different fabric, perhaps with a boat neck? Who knows. I’ve got some exciting stuff coming up, so please don’t get board with me based on the quality of this post! Happy sewing πŸ™‚

A Kit Dress (McCall’s 6885)

A Kit Dress (McCall’s 6885)

Posing gets even more awkward than this, I am so sorry.

I’ve been on a pretty serious destashing kick, so buying this Craftsy kit came as a bit of surprise to even me. That said…fabric and a pattern for $15? No way I was passing that up!

I don’t know why I insist on looking down

The pattern is McCall’s 6885, and the fabric is Robert Kaufman’s dotty chambray, and I’m a big fan. The model on the pattern packaging is wearing something truly heinous, but please don’t let that deter you.

Photo "credit" to McCall's. Yes, the hat pattern is included.
Photo “credit” to McCall’s. Yes, the hat pattern is included.

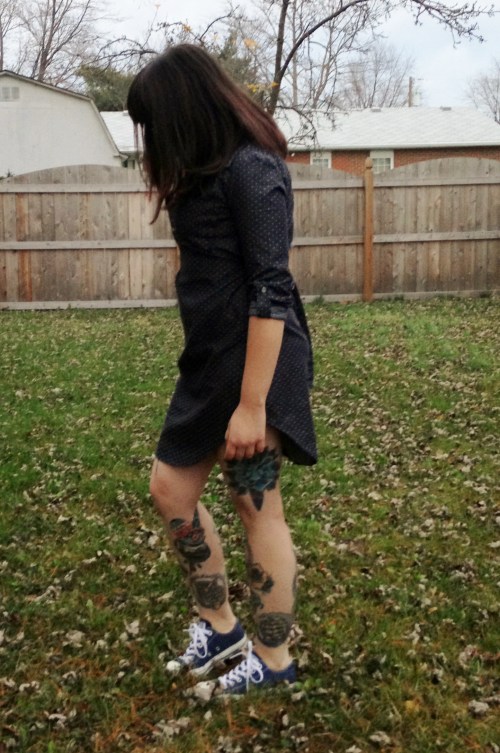
I really liked the look of view D, kind of like a oversized men’s shirt but wearing it as a dress look, so that’s what I went with. Based on the pattern size chart, I should have graded between a size 14 and a 16. Based on everything I know about myself, I cut a 12. I do not like my clothes that loose, but that’s just personal preference. I liked the way the 12 fits, but I would cut the sleeves a teensy bit bigger if I could do it again. Also the sides come up a bit high, but that’s just the pattern design. I would suggest wearing tights if you want to look classy. I give no fucks about that.

Trying to look cool but even Amy’s dog is judging me.

The construction is pretty simple, as far as anything with a collar goes. There are various methods for collar constructing, but I opted to just go with the pattern version. The button placket is way easier than I expected!! If that kind of thing scares you, have no fear. Mine is far from perfect, but that’s honestly just because I get in my own head and freak myself out. There are also plackets (tabs? I don’t know) on the sleeves, but those are even easier. There is no yoke in the back, unlike the previous shirt dress I made, seriously a no fuss dress.

Okay so maybe the back is bit snug. Whatever.

I did snap buttons on this one again, because I still haven’t replaced my buttonhole foot. Yes, you should definitely button/snap to the second button/snap. I like to have cleavage, so I don’t. Again, preference.

A little boobage never hurt anyone, probably.

I will for sure sew this pattern again, it’s easy and it would definitely fit into my wardrobe. I also really dig this fabric, I really want to make another dress with it and button down, at least. This is the second time I’ve sewn with chambray, and I would definitely say this is the higher quality fabric. It doesn’t wrinkle nearly as easily, though the skirt portion did wrinkle when I sat at my desk for a long period of time. All things considered, I really like this, I’ve actually worn it a few times since I made it! If the Crafty kits ever come back in stock, I’d suggest snatching one up. Happy sewing πŸ™‚

Cardigan Trials (McCall’s 6844)

Cardigan Trials (McCall’s 6844)

Check out my wingspan, yo.

It’s hard to look through all these smiling pictures from weeks ago, when I can’t muster a smile now. I lost a very dear friend, and one of the few people on the earth I’ve ever connected with, on Friday. I won’t go on and on about it, but forgive me if I’m a little morose, okay?

Why do jeans have such tiny pockets??

This is the McCall’s 6844 cardigan pattern, you’ve probably sewn it yourself. It’s been done by everyone, I think. I cut this particular version last year, before I had even started blogging. The fabric is a lovely sequined sweater knit from Joann’s, and unfortunately, they don’t seem to carry it anymore. πŸ™ But yay for finishing projects!

Long enough to cover the ghetto booty.

Somewhere along the line, I managed to lose this pattern. So the garment you seen here is the product of cut pattern pieces and what I felt like should happen to them. I serged the bodice portion together, added the lower pieces, scarf-type pieces, and then sleeves. All just serged, no darts or gathers of any kind. I vaguely recall the pattern calling for interfacing, but this didn’t get any. I also have two extra scarf pieces that I did NOTHING with. We’re calling this one a wearable muslin, okay? And, just like before, I have no idea what size I cut.

Awkward Cousin Itt photo

Apparently, when I cut this fabric, I did so with reckless disregard for the strips on the fabric. For the most part, it actually came out pretty okay. In the photo above, you can see where it did not! Β Also, just like in my previous post, it’s a bit snug. When I make this again, I’ll grade up in the sleeves. Since this is just a muslin, and a knit, I didn’t finish the hem or the sleeves. I kinda dig the way it came out, though!!! Perfect for work, comfortable to wear around the house. Oh!! And check that tank underneath, recognize it? It’s the peplum top I made! I wear the hell out of this thing, definitely my most worn make!

Remember me?
Remember me?

This quick cardigan was definitely worth a make for me. And I get the deeply satisfying feeling of cleaning up old UFO’s in my sewing room! Win win. Pardon the short post, this is all the cheer I could manage. Happy sewing πŸ™‚

The Nightmare Dress (Butterick 6089)

The Nightmare Dress (Butterick 6089)

Blah.
Blah.

Do you remember the Nightmare Coat? It was my very first post, so probably not. The nightmare coat earned it’s name based on that fucking headache-inducing fabric. The nightmare dress is made of something very similar, just thinner. It’s a thin wool houndstooth, from Joann’s sometime last year. It also has the same tendency to fray and drive me insane.

Lol Springsteen butt.

I had originally made this dress with a longer hem line and 3/4 sleeves, so that I could wear it work without a cardigan. When I say originally, I mean last Christmas, when I started this one (I’ve been on a serious finishing ufo’s kick). To be honest, it looked a kinda dowdy that way. A little Laura Ingalls Wilder, ya know? To top it off, the fabric seemed to fray every time I looked at it, even though I’d stitched and serged everything? I need some tips on dealing with this tricky fabric!

Finished!
Finished!

Forward to a few weeks ago, when I decided to dust it off (literally) and fix it. I chopped the sleeves off and raised the hem above the knee, then just turned under and hemmed. In honesty, I have no idea where the pattern is or what size I cut. I do remember assembling the bodice and skirt per the pattern instructions. Last winter I was a good bit thinner than I am now, and it shows in this dress. Check out the pleats in the picture below to see what I’m talking about.

See the pulling?

I kinda like this dress as is, I just would make it a bit looser, fix the arm scythe, and use a different fabric. I love the red and black, it gives it a sort of 90’s punk rock look, which I am all about. But this fabric…ugh. Never again. NEVER!!!

I don't give a fuck what you think.
I don’t give a fuck what you think.

All of that said, I will wear this dress until it falls apart. I wear every single garment I’ve ever made, even the fails. I took my time and effort to make something out of a flat sheet of fabric, and that’s damn impressive. I am proud of each project, truly. If you don’t like what I make or feel I could have made it better, you don’t have to look at it. That’s how it works. I have found the online sewing community to be extremely warm and welcoming overall, I love talking to you all and seeing all the wonderful things you’ve made. I like discussing techniques and laughing at errors with you. But for the minority of you who just choose to be kind of shitty, might I suggest you fuck off? Β